You've just deployed your shiny new GitHub Pages website, but there's a problem: nobody can find it on Google. Search engines can take months to naturally discover and index your site - if they find it at all.
The good news? You don't have to wait. This guide shows you exactly how to get your site indexed by Google and Bing in just a few days instead of months, making your content immediately discoverable to users on Google, Bing, DuckDuckGo, Yahoo, and all other major search engines.
Why Just Google and Bing? What About DuckDuckGo and Others?
You might wonder: "Shouldn't I submit my site to every search engine individually?" Actually, no - you only need to focus on two.
Google dominates with roughly 90% of global search market share. Get indexed here, and you're instantly visible to the vast majority of internet users.
Bing is the secret backbone of the search ecosystem. While Bing itself has around 3% market share, many popular "alternative" search engines actually use Bing's index behind the scenes:
- DuckDuckGo - Pulls most results from Bing's API
- Yahoo - 100% powered by Bing since 2010
- Ecosia - Uses Bing's search infrastructure
- Qwant - Relies partially on Bing's index
The bottom line: Get indexed on Google and Bing, and you've automatically covered 95%+ of all search traffic across dozens of search engines. Let's get started.
Prerequisites: Setting Up for Search Engine Crawlers
Before we can tell Google and Bing about your site, we need to make sure it's ready to be crawled. Think of this as rolling out the welcome mat for search engine bots.
You'll need two key files: robots.txt (which tells crawlers they're welcome) and sitemap.xml (which gives them a map of your site). Don't worry - if you're using any modern static site generator, these are usually just a quick config change away.
Step 1: Configure robots.txt
Your robots.txt file is like a bouncer for your website. It tells search engine crawlers (Googlebot, Bingbot, etc.) which parts of your site they're allowed to visit.
Without a proper robots.txt, you might accidentally be turning away the very bots you want to visit. For GitHub Pages, this file needs to live at the root of your deployed site (e.g., https://username.github.io/robots.txt).
Here's what a properly configured robots.txt looks like (you can view this site's robots.txt as an example):
User-agent: *
Allow: /

Sitemap: https://filipmikina.com/sitemap-0.xml
Here's what this means:
User-agent: *- "Hey, this applies to ALL search engine bots"Allow: /- "You're welcome to crawl everything on my site"Sitemap:- "Here's a map to help you find all my pages"
How to add this to your GitHub Pages site:
Good news: most static site generators make this trivial. Usually, you just create a robots.txt file in your public/ directory, and it automatically gets deployed to the root.
For example, on this Astro blog, it's just this file in public/robots.txt. That's it!
Using plain HTML without a framework? Just create a robots.txt file in the root of your repository where your index.html lives. GitHub Pages will serve it automatically.
Framework-specific guides for adding robots.txt:
Step 2: Generate and Configure Your Sitemap
Your sitemap is literally a map of your website. It's an XML file that lists every important page you want search engines to know about. Instead of search bots wandering around trying to find all your pages, you're handing them a complete directory.
Here's an example of what a sitemap looks like (view this site's sitemap):
<?xml version="1.0" encoding="UTF-8"?>
<urlset
	xmlns="http://www.sitemaps.org/schemas/sitemap/0.9"
	xmlns:news="http://www.google.com/schemas/sitemap-news/0.9"
	xmlns:xhtml="http://www.w3.org/1999/xhtml"
	xmlns:image="http://www.google.com/schemas/sitemap-image/1.1"
	xmlns:video="http://www.google.com/schemas/sitemap-video/1.1">
	<url>
		<loc>https://filipmikina.com/</loc>
	</url>
	<url>
		<loc>https://filipmikina.com/blog/</loc>
	</url>
</urlset>
Important: Never write your sitemap by hand - it will quickly become outdated as you add content. All modern static site generators can automatically generate and maintain your sitemap for you.
Using plain HTML without a framework? You'll need a sitemap generator tool. Try XML Sitemaps Generator or install a simple tool like sitemap-generator to create one automatically.
Framework-specific sitemap configuration:
Verification step: After deployment, verify both files are accessible by visiting https://your-site.com/robots.txt and https://your-site.com/sitemap-0.xml (or similar) in your browser. You should see the actual file contents displayed, not a 404 error page.
Getting Indexed on Google Search Console
Now comes the important part: actively requesting indexing from Google. To do this, you need to prove ownership of your GitHub Pages site. There are two scenarios:
- Using GitHub's default domain (
username.github.io/project) - Using a custom domain (
your-domain.com)
Both methods work, but the verification process differs slightly. We'll cover both approaches below. Once you're verified on Google, you can easily import your site to Bing Webmaster Tools (covered later).
Option 1: Using GitHub's Default Domain
If you're using GitHub's default domain format (username.github.io/project), follow these steps. We'll use fiffeek.github.io/docs-test as an example throughout.
Step 1: Navigate to Google Search Console and enter your full URL in the URL prefix field on the right side:
Step 2: Google will ask you to verify ownership. The easiest method is using an HTML meta tag. Click on the HTML tag option:
Step 3: Expand the HTML tag section to reveal your unique verification code:
Step 4: Copy the meta tag and add it to your site's <head> section. The implementation varies by framework.
For example, with Docusaurus, you can add it to your config file (see the actual commit):
headTags: [
  {
    tagName: 'meta',
    attributes: {
      name: 'google-site-verification',
      content: 'LaGbZet27I9VYSccGGJ1xGrpwg4lm8xlEOkBu4DGnn4',
    },
  },
],
After deploying, verify the tag appears in your page source. To check: visit your site in a browser, right-click anywhere on the page, select "View Page Source" (or press Ctrl+U / Cmd+U), and look for this meta tag in the <head> section:
<meta
  name="google-site-verification"
  content="LaGbZet27I9VYSccGGJ1xGrpwg4lm8xlEOkBu4DGnn4"
/>
Framework-specific guides for adding meta tags:
Step 5: Once deployed and verified in your page source, click the Verify button in Google Search Console:
Step 6: Submit your sitemap. Navigate to the Sitemaps section in the left sidebar and enter just your sitemap filename (e.g., sitemap-0.xml or sitemap.xml - not the full URL):
Step 7 (Optional): Request priority indexing for specific pages. Enter any URL from your site in the search bar at the top:
Step 8: You'll likely see the page isn't indexed yet (this is normal for new sites):
Step 9: Click Request indexing after running a live test to verify the page loads correctly:
Option 2: Using a Custom Domain or Subdomain
If you're using a custom domain (like docs.yourdomain.com), the process is similar but involves DNS configuration. This example uses hyprdynamicmonitors.filipmikina.com as a reference.
For detailed GitHub Pages domain setup, refer to the official GitHub documentation.
Step 0: Verify your domain on GitHub (CRITICAL SECURITY STEP)
⚠️ Security Warning: Before setting up any GitHub Pages custom domain, you must verify your domain to prevent subdomain takeover attacks. This is not optional.
Domain verification ensures that only repositories you own can publish content to your domain and its subdomains. Without verification, attackers can hijack your dangling subdomains and serve malicious content. For a detailed explanation of how this attack works and real-world examples, see my blog post on subdomain takeovers.
How to verify your domain:
- Go to your GitHub Pages settings
- Click on Add domain under the "Verified domains" section
- GitHub will prompt you to add a
TXTrecord to your DNS. This record proves you own the domain.
- Add the
TXTrecord to your DNS provider (example shown for Squarespace):
- Verify the DNS record has propagated using
dig:
❯ dig _github-pages-challenge-fiffeek.filipmikina.com +nostats +nocomments +nocmd TXT
;_github-pages-challenge-fiffeek.filipmikina.com. IN TXT
_github-pages-challenge-fiffeek.filipmikina.com. 14400 IN TXT "674546f1e2776c5e492e7ad6cde031"
- Return to GitHub and click Verify. Once successful, you'll see a green checkmark:
What domain verification protects you from:
According to GitHub's documentation:
When you verify a custom domain for your personal account, only repositories owned by your personal account may be used to publish a GitHub Pages site to the verified custom domain or the domain's immediate subdomains.
Once verified, all subdomains under your domain (e.g., *.filipmikina.com) are automatically protected. Attackers cannot claim these subdomains for their own GitHub Pages sites, even if you have dangling DNS records.
This protects you from:
- Phishing attacks using your domain's trust
- SEO poisoning and reputation damage
- Cookie theft and session hijacking
- OAuth callback hijacking
Don't skip this step. Domain verification takes 5 minutes and prevents serious security vulnerabilities. For more details on what can happen if you skip this, read my detailed writeup on GitHub Pages subdomain takeovers.
Step 1: Configure the CNAME File
When you set a custom domain in your GitHub repository settings:
GitHub automatically creates a CNAME file in your gh-pages branch:
hyprdynamicmonitors.filipmikina.com
Important: Most static site generators will overwrite this file during deployment. To prevent this, add the CNAME file to your source code so it gets included in every build.
For Docusaurus, add it to your static folder (example):
hyprdynamicmonitors.filipmikina.com
Framework-specific CNAME configuration:
Step 2: Update Your Site's Base URL
Configure your static site generator to use the custom domain as the base URL.
For Docusaurus:
const config: Config = {
  url: "https://hyprdynamicmonitors.filipmikina.com",
};
Framework-specific URL configuration:
Step 3: Configure DNS with Your Domain Provider
Navigate to your domain provider's DNS management page and create a CNAME record pointing your subdomain to GitHub Pages. For example, hyprdynamicmonitors → fiffeek.github.io:
Verify DNS propagation by opening your terminal and running this command (replace with your domain):
dig hyprdynamicmonitors.filipmikina.com +noall +answer -t A
Expected output showing your CNAME is properly configured:
hyprdynamicmonitors.filipmikina.com. 9466 IN CNAME fiffeek.github.io.
fiffeek.github.io.      2371    IN      A       185.199.108.153
fiffeek.github.io.      2371    IN      A       185.199.109.153
fiffeek.github.io.      2371    IN      A       185.199.110.153
fiffeek.github.io.      2371    IN      A       185.199.111.153
Once propagated, your site should be accessible at your custom domain (e.g., hyprdynamicmonitors.filipmikina.com).
Step 4: Verify Domain Ownership in Google Search Console
If you haven't already verified your root domain in Google Search Console, you'll need to do that first. This step proves you own the entire domain (not just the subdomain):
- Go to Google Search Console and enter your root domain (not subdomain) in the Domain field on the left:
- Google will provide a TXT record that you need to add to your DNS settings to prove ownership:
- Add the TXT record to your domain provider's DNS management panel:
- Wait for DNS propagation (usually 5-30 minutes), then click Verify in Google Search Console.
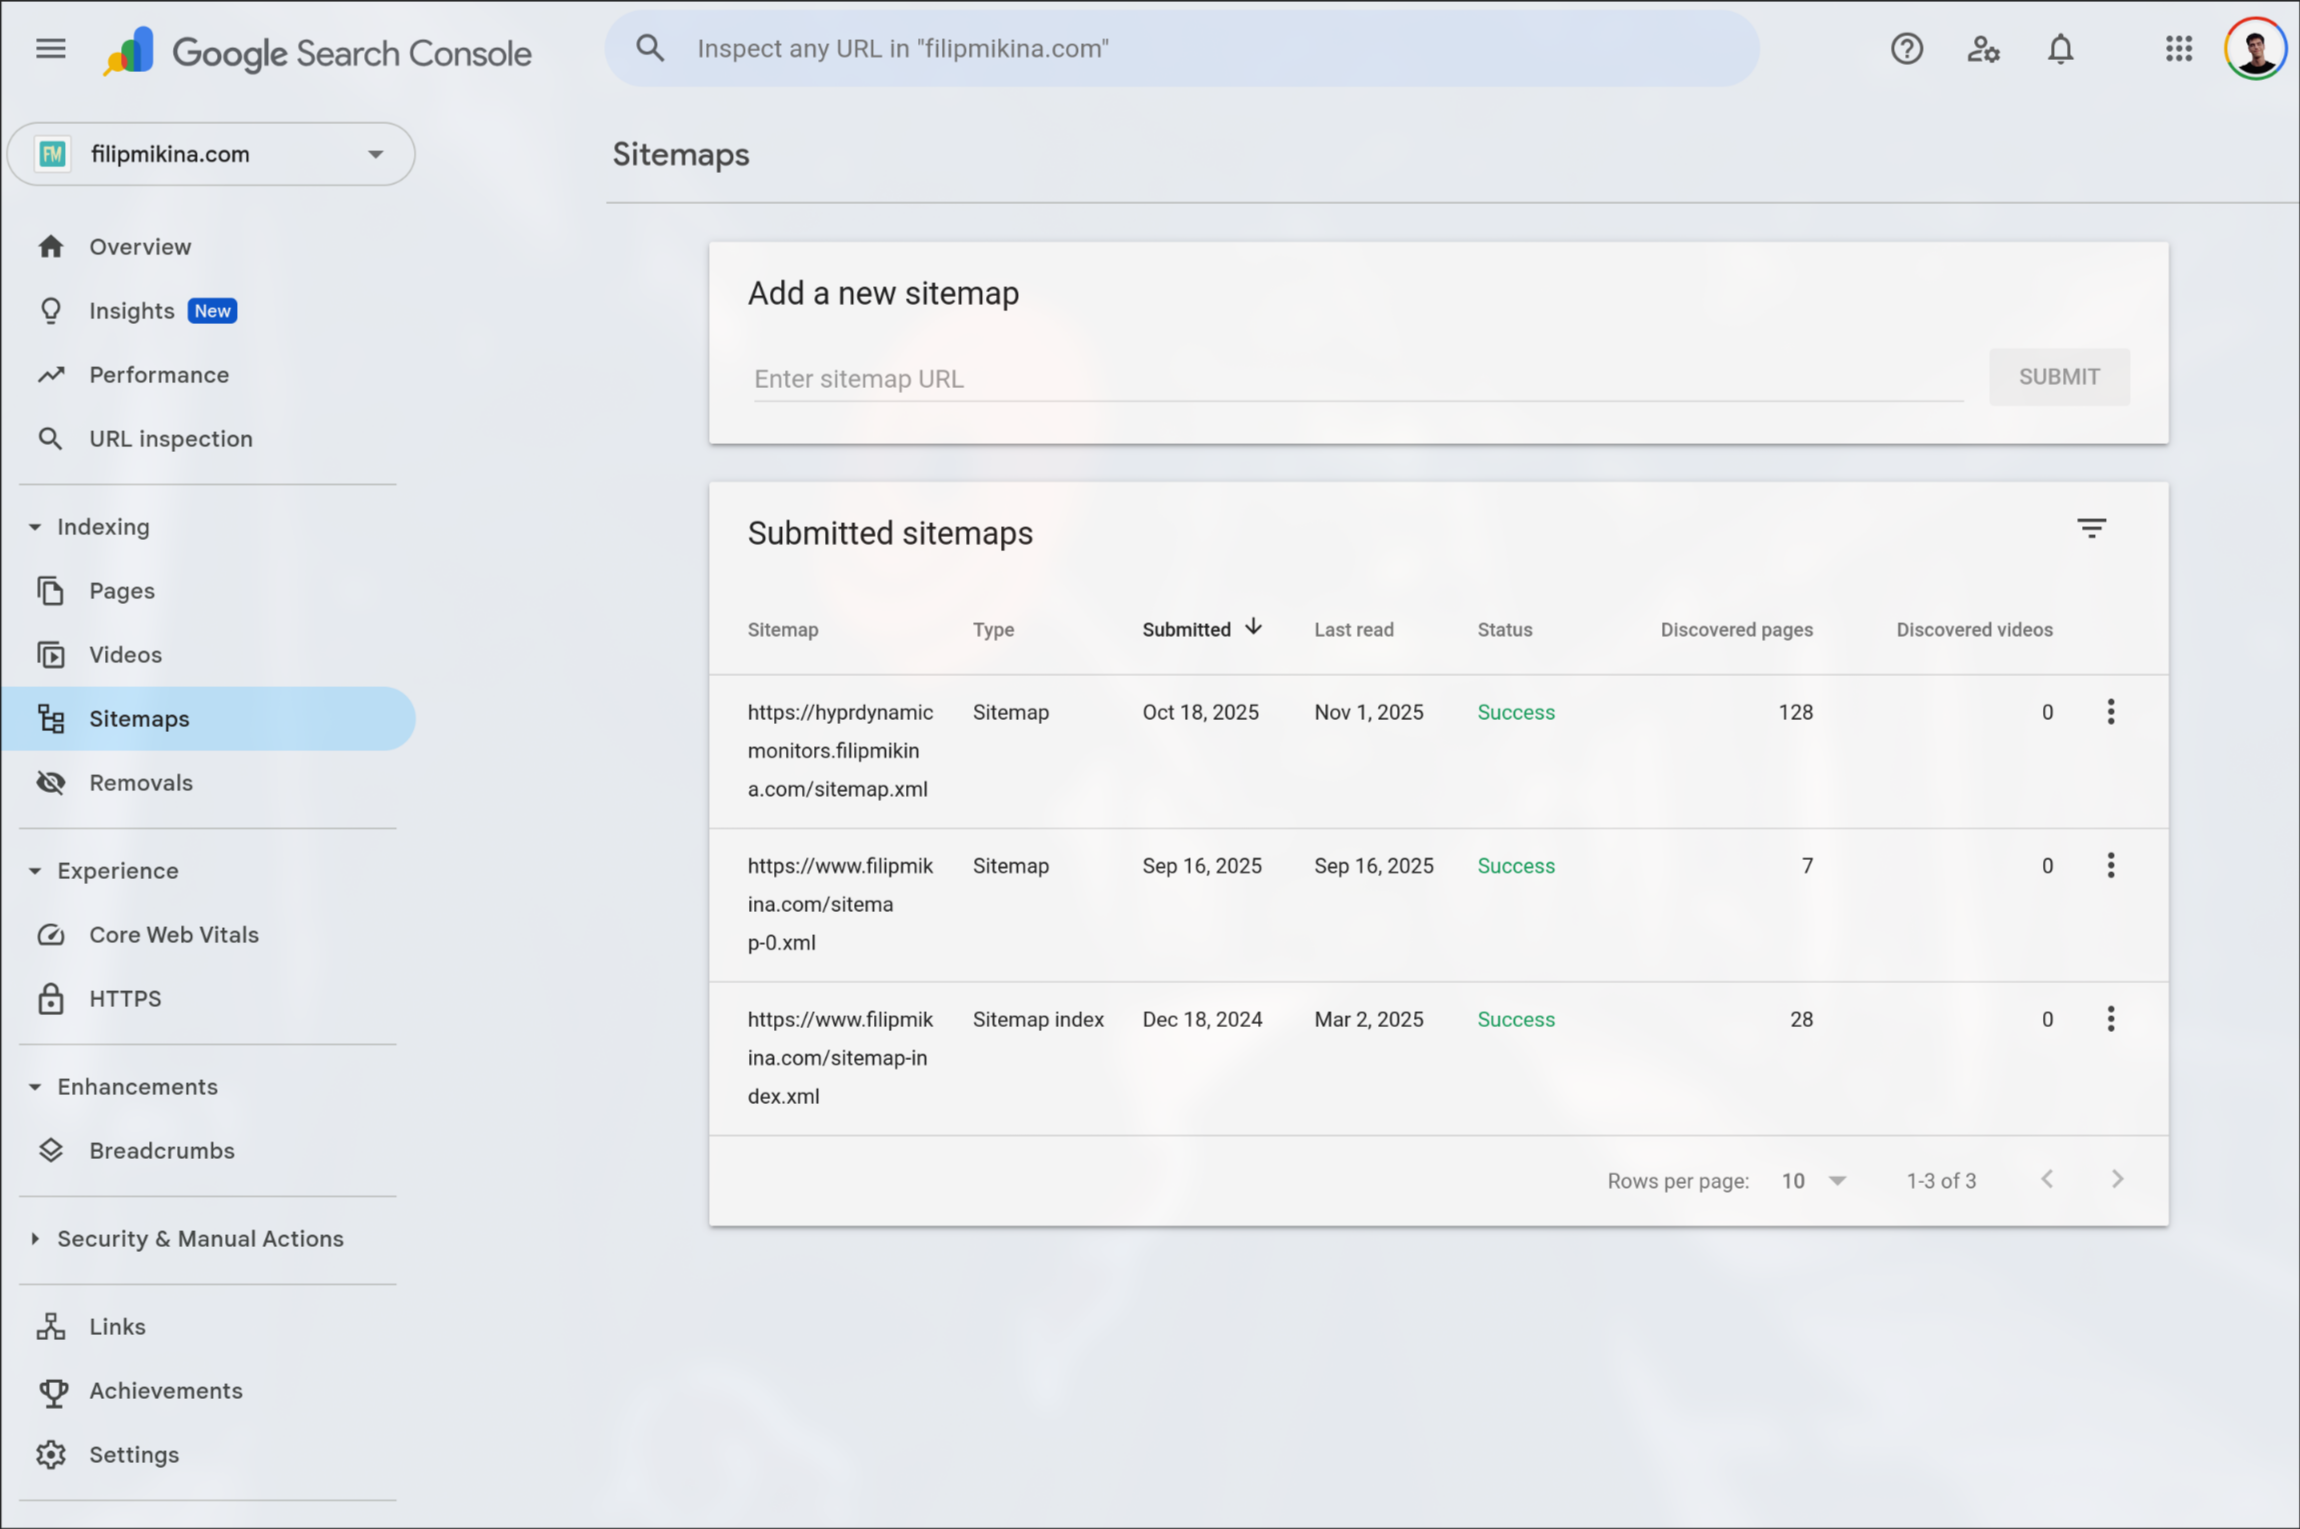
Step 5: Submit Your Sitemap
With your domain verified, navigate to the Sitemaps section and submit your sitemap:
You can also request individual pages to be indexed using the same URL inspection process described in Option 1, Steps 7-9.
Getting Indexed on Bing (The Easy Way)
Here's the good news: once you've set up Google Search Console, getting indexed on Bing is incredibly simple. Bing Webmaster Tools can import your verified sites directly from Google Search Console, saving you from repeating the verification process.
Step 1: Navigate to Bing Webmaster Tools and sign in with your Microsoft account.
Step 2: Choose the Import from Google Search Console option:
Step 3: Authorize Bing to access your Google Search Console data. Your sites, sitemaps, and verification will be automatically imported - no manual configuration needed!
Step 4 (Optional): Use the Bing URL Inspection Tool to request priority indexing for specific pages, just like you did with Google Search Console.
What to Expect
After completing these steps, you should see your pages start appearing in search results within:
- Google: 3-7 days for most pages
- Bing: 5-10 days for most pages
- DuckDuckGo, Yahoo, Ecosia: Same as Bing (since they use Bing's index)
Remember that search engines continuously crawl and update their indexes. Your sitemap will help them discover new content automatically as you publish it.
Quick Troubleshooting
If your pages aren't being indexed:
- Verify robots.txt - Make sure you're not accidentally blocking search engines
- Check your sitemap - Ensure it's accessible and contains valid URLs
- Review Search Console errors - Both Google and Bing provide detailed error reports
- Be patient - Initial indexing can take up to 2 weeks in some cases
- Submit individual URLs - Use the URL inspection tools to prioritize important pages
With these steps completed, your GitHub Pages site will be discoverable across all major search engines, helping users find your content quickly and easily.